Comprehensive Checklist for Plaster Surface Preparation and Materials
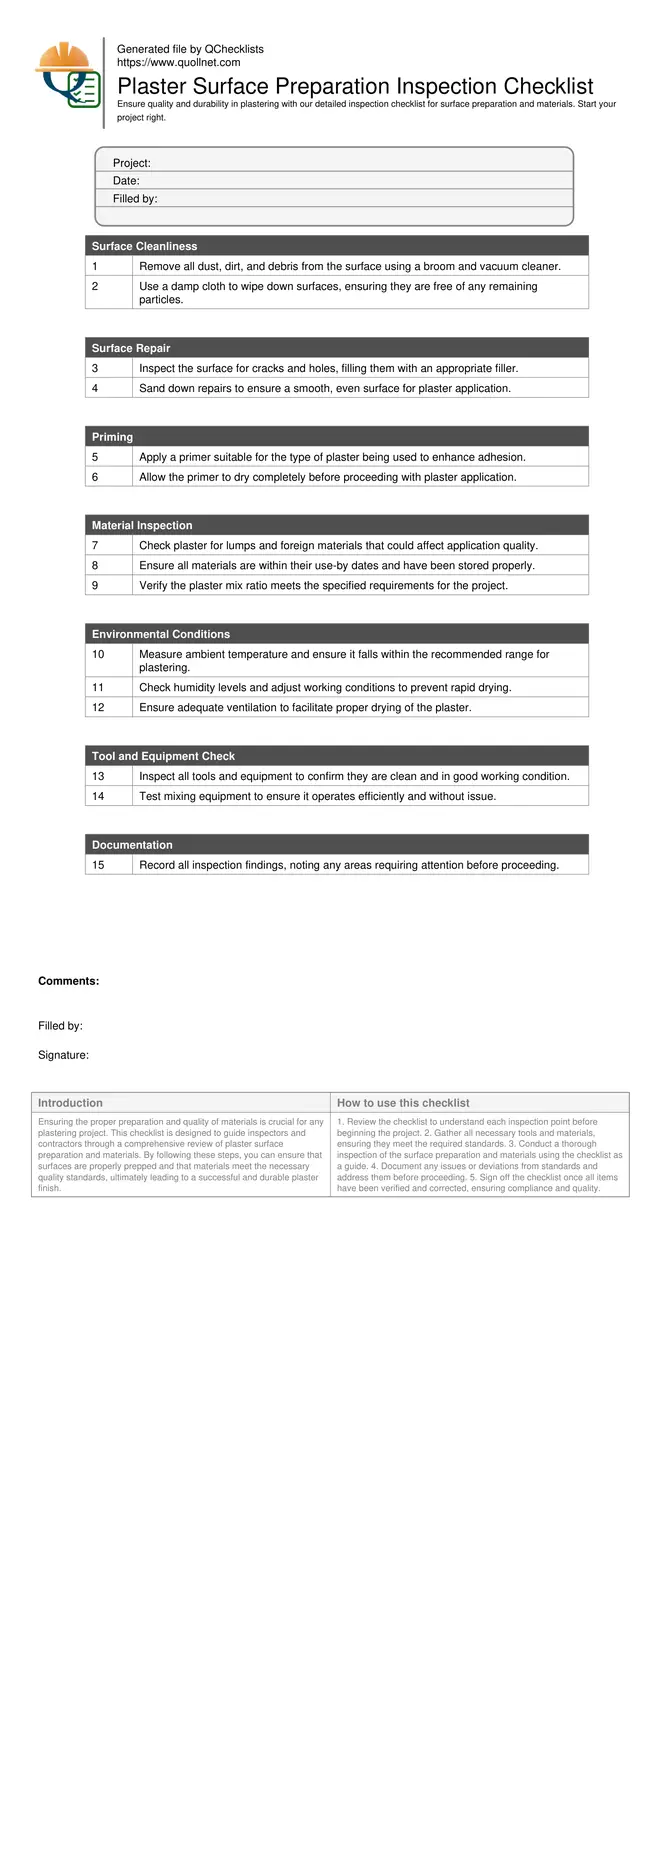
Ensuring the proper preparation and quality of materials is crucial for any plastering project. This checklist is designed to guide inspectors and contractors through a comprehensive review of plaster surface preparation and materials. By following these steps, you can ensure that surfaces are properly prepped and that materials meet the necessary quality standards, ultimately leading to a successful and durable plaster finish.
- Ensure surfaces are clean and free of debris, enhancing adhesion and finish quality.
- Verify that all materials, including plaster, meet quality standards to prevent failures.
- Check that environmental conditions are suitable for plaster application, avoiding common pitfalls.
- Confirm that tools and equipment are in good working order for efficient and effective application.
- Document findings systematically to maintain quality assurance and compliance records.
Surface Cleanliness
Surface Repair
Priming
Material Inspection
Environmental Conditions
Tool and Equipment Check
Documentation
Importance of Surface Preparation
Proper surface preparation is the foundation of a successful plastering job. It involves cleaning, repairing, and priming surfaces to ensure optimal adhesion of plaster. Neglecting this phase can lead to poor adhesion, cracking, and reduced durability of the plaster finish. This section covers the essential steps and checks to ensure surfaces are adequately prepared.
- Remove all loose debris and dust from surfaces.
- Repair any cracks or holes before applying plaster.
- Ensure surfaces are dry and free from moisture.
- Apply a suitable primer to enhance plaster adhesion.
- Check surface levelness with a straightedge.
Assessing Plaster Material Quality
The quality of plaster materials directly affects the finish and longevity of a plastering project. It is vital to inspect the materials for compliance with industry standards and suitability for the specific application. Poor-quality materials can lead to issues such as uneven application and surface imperfections.
- Verify plaster mix complies with project specifications.
- Check for lumps or foreign materials in the plaster.
- Ensure plaster has been stored correctly to prevent contamination.
- Confirm the shelf life of the plaster is still valid.
- Inspect the plaster's consistency before application.
Environmental Conditions for Plastering
Environmental conditions play a crucial role in the success of plaster application. Conditions such as temperature, humidity, and ventilation can affect drying times and adhesion. This section outlines the ideal conditions that should be verified before starting any plastering work.
- Ensure ambient temperature is within the recommended range.
- Check humidity levels to prevent plaster from drying too quickly.
- Verify proper ventilation in the work area.
- Avoid plastering in direct sunlight or windy conditions.
- Monitor weather forecasts for potential changes.
How to Use This Plaster Inspection Checklist
- Review the checklist to understand each inspection point before beginning the project.
- Gather all necessary tools and materials, ensuring they meet the required standards.
- Conduct a thorough inspection of the surface preparation and materials using the checklist as a guide.
- Document any issues or deviations from standards and address them before proceeding.
- Sign off the checklist once all items have been verified and corrected, ensuring compliance and quality.
Call to Action
-
Start Interactive Checklist
Tick off tasks, leave comments on items or the whole form, and export your completed report to PDF or Excel—with a built-in QR code for authenticity.
- Download Excel - Plaster Surface Preparation and Materials Inspection Checklist
- Download PDF - Plaster Surface Preparation and Materials Inspection Checklist
- View Image - Plaster Surface Preparation and Materials Inspection Checklist